Congratulations on your purchase of the new DROIX NH8 USB Hub! You’ve just unlocked the potential to enhance your handheld gaming experience. This Getting Started the DROIX NH8 USB Hub with NVMe guide will help you make the most of your NH8, from installing NVMe storage to enjoying 4K gaming at 60Hz, as well as utilizing a 1000Mbps Ethernet connection. We’ll walk you through each step. So, get ready to embark on an exciting journey to upgrade your gaming adventures!
At GPD Store, we strongly support the user’s Right to Repair. If you encounter any issues and feel confident in your ability to fix them, we encourage you to do so! However, you can always reach out to GPD Store Customer Support for assistance or any questions you may have.
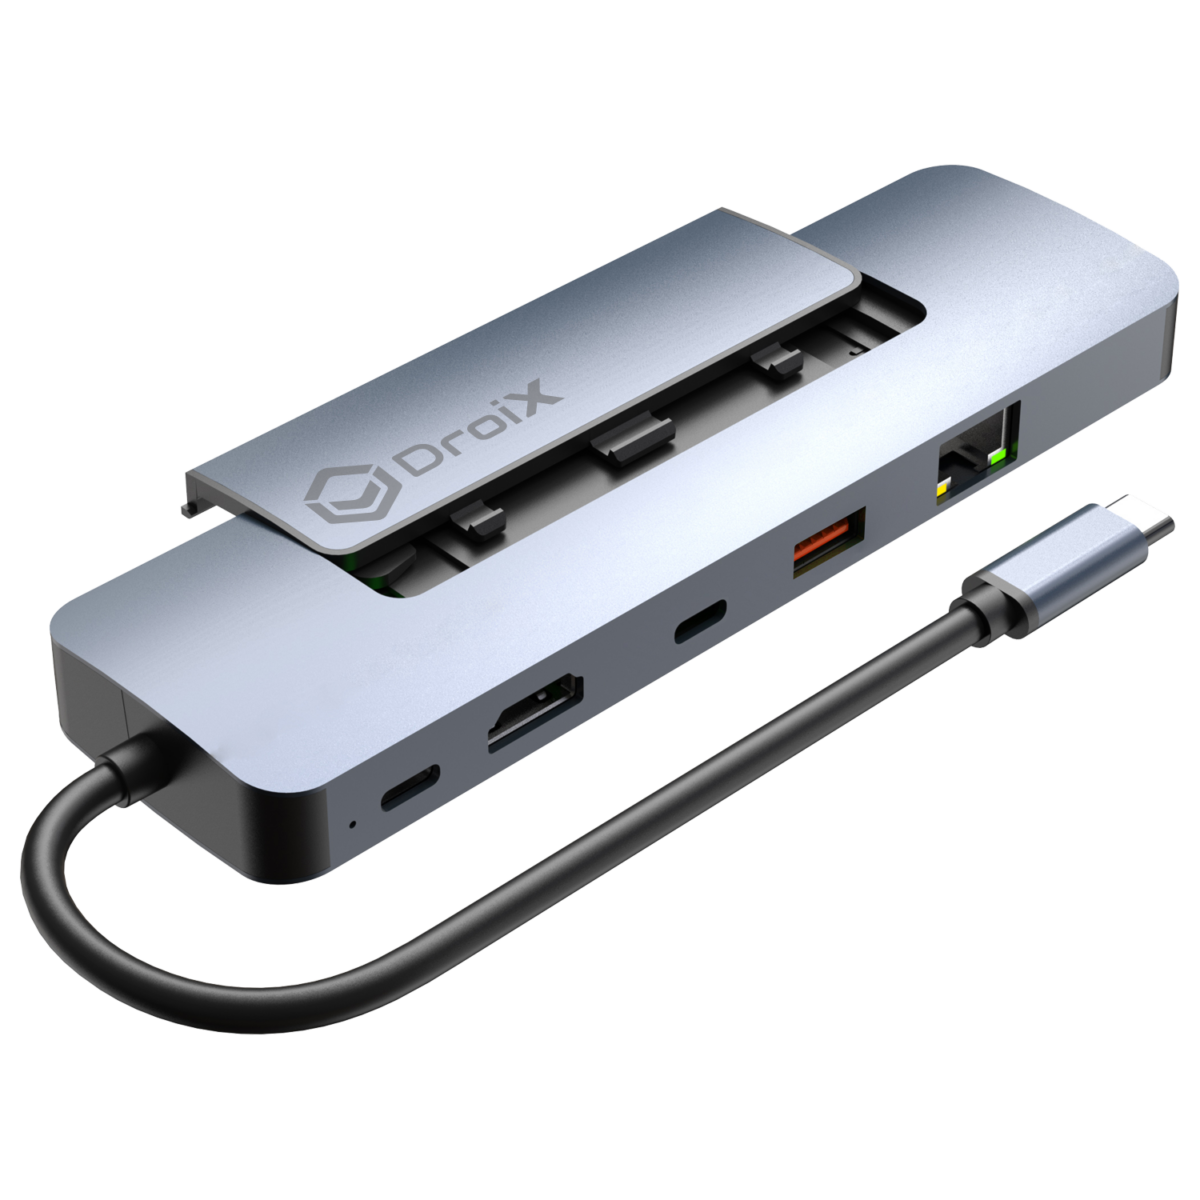
What’s in the Box?
When setting up, make sure you have all the necessary components and accessories. While unboxing, handle the USB hub carefully to prevent any damage. Inside the box, you should find:
1x DROIX NH8 USB Hub

What’s in the DROIX NH8 USB Hub with NVMe box
If anything is missing or unclear, don’t hesitate to contact GPD Store Customer Service, and we’ll be happy to assist you.
Testing the DROIX NH8 USB Hub with NVMe
It’s time to run some tests to ensure everything is functioning as expected. If any specific test fails, try using multiple cables to determine if the issue lies with the cable or the NH8 hub itself. During troubleshooting, make sure all cables are securely connected to the correct ports.
NH8 USB Hub Tests
- Physical Damage: Inspect the hub’s outer casing for any signs of damage.
- Device Connection: Connect your device to the NH8 Hub. To confirm the device is recognized, you can perform either the PD port test or the HDMI test.
- USB-C PD Port: Plug your charger into the PD port at the back of the hub to ensure your device is charging properly.
- USB-C Port: Connect your peripherals to the USB-C port located at the back of the hub and confirm that they are functioning correctly.
- USB-A 3.0 Port: Test different USB devices by plugging them into the USB-A ports and ensure each one is recognized and working as expected.
- HDMI Port: Power on your handheld device and display, then switch to the correct HDMI input. If an image appears on the display, the HDMI port is functioning properly.
- Ethernet Port: Connect an ethernet cable to the hub and your router or modem. Check if your handheld device has internet access via the ethernet connection to ensure the port is working.
If any issues persist, contact GPD Store Customer Support for further assistance.
What you can do with the NH8 hub
Make sure the NH8 Hub is positioned in a secure spot. Take care to avoid any damage to both the USB hub and your connected handheld device. As you follow the instructions in this section of the guide, refer to the images below to identify the correct ports and connections on the NH8 USB Hub.
Connect Your Handheld Device
Begin by connecting your handheld gaming device using the USB Type-C cable attached to the NH8 (refer to Image 1 below).
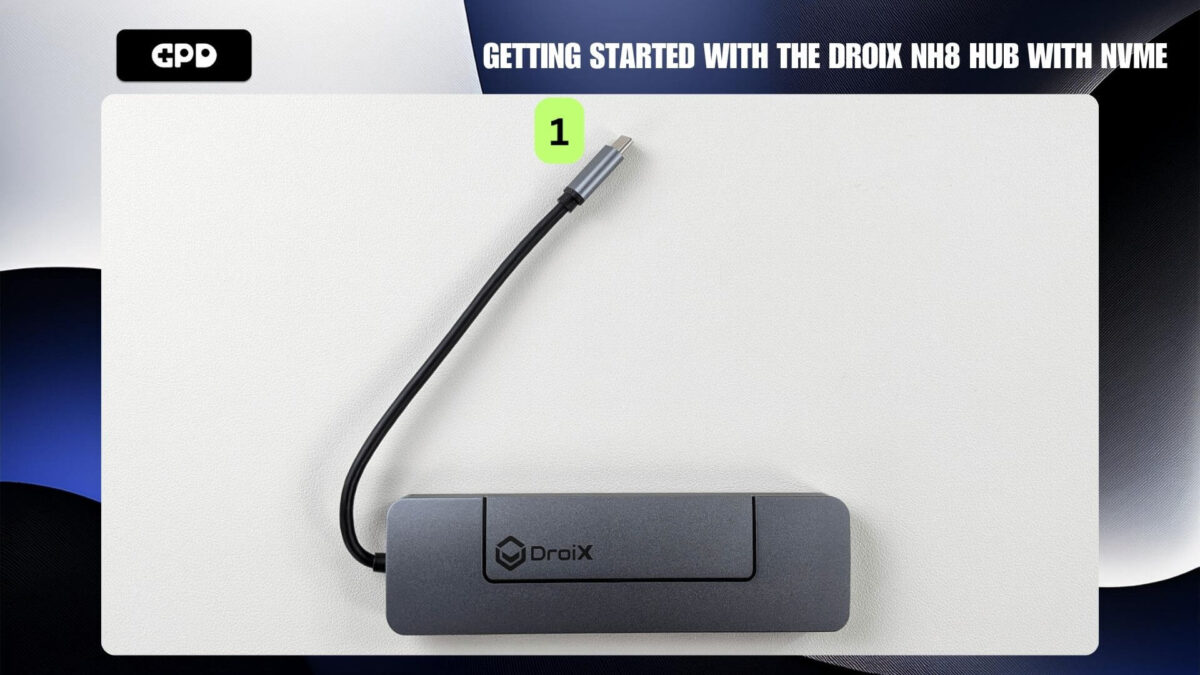
- USB-C Cable
Power & Charge Your Device
Next, ensure your GPD handheld gaming PC or mini laptop is powered and charged for those long gaming sessions. Connect a charger to the USB-C PD Port located on the back of the hub (refer to Image 2 below). Note that while there are two USB-C ports, only one is specifically for charging, located next to the power LED, as highlighted below. When properly connected, the power LED will display a solid light. If the LED flashes, the power cable is likely plugged into the wrong port.

- USB-C PD Port
The charger is not included with the hub – so we recommend you use the charger that comes with your handheld device or consider investing in a 100W adapter for faster charge.
Connect Your Display
To enhance your gaming experience on a larger screen, connect an HDMI cable between your NH8 hub and your display (refer to Image 3 below). This could be a TV, monitor, or other compatible display. Make sure to change the display input source to the correct HDMI input if needed. The NH8 supports up to 4K resolution at a 60Hz refresh rate, delivering an immersive experience and allowing you to enjoy your games or media in the highest possible quality. Please note, the HDMI cable is not included in the packaging.
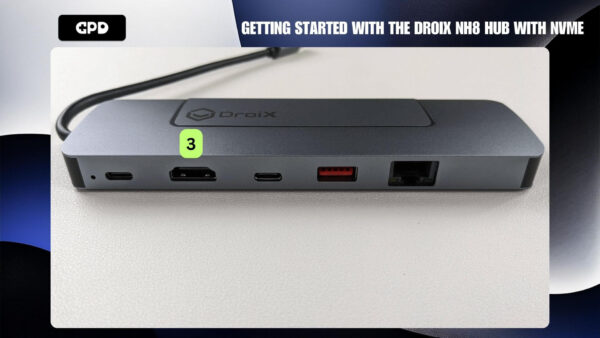
- HDMI Port
USB-C Ports
The DROIX NH8 USB Hub is equipped with 2x USB-C ports located on the back of the device (refer to Image 4 below). These ports open up a range of possibilities, allowing you to connect peripheral devices like controllers, headsets, keyboards, mice, or other USB Type-C accessories. Not only does this enhance your gaming experience, but it also transforms your Windows handheld device into a more versatile tool. You can easily browse the internet, watch videos, shop online, and engage in general PC activities, significantly extending the capabilities of your handheld device beyond gaming.
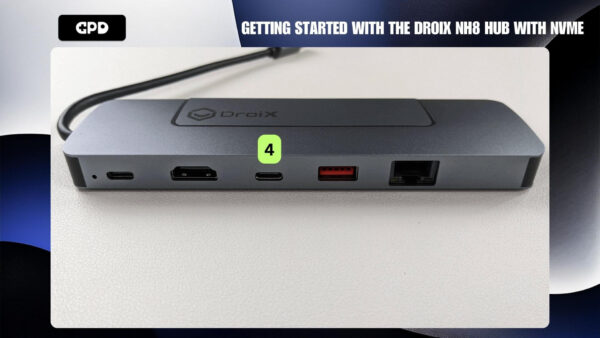
- USB-C Port (No Charging)
USB-A 3.0 Ports
In addition, the DROIX NH8 USB Hub includes 1x USB-A 3.0 port located at the back of the device (refer to Image 5). Like the USB-C ports, this port opens up even more possibilities for connecting peripherals or other USB Type-A devices. This feature enhances your gaming experience while also expanding the functionality of your Windows handheld device, allowing you to use it for a variety of tasks beyond gaming.
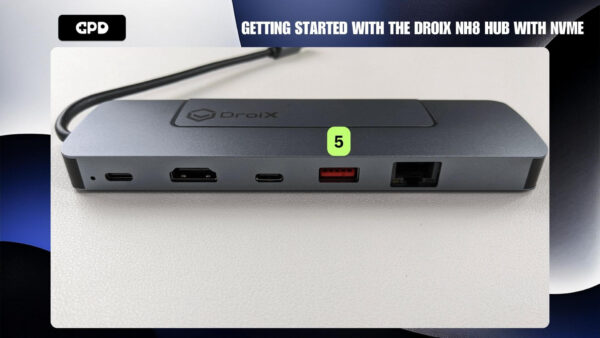
- USB-A Port
Ultra-Fast Internet Connection
For a fast, stable, and reliable internet connection, you can plug an ethernet cable directly into the hub, reducing latency and boosting your performance in online gaming and media streaming. The ethernet port is located conveniently on the back of the NH8 Hub (refer to Image 6 below). Please note that the ethernet cable is not included.

- Ethernet Port
SD & MicroSD Card
SD cards offer a convenient way to expand your storage, making it easy for gamers to carry large game libraries and media collections in a compact form. With the capability to swiftly transfer files and manage content across devices, you can not only expand your storage but also install games effortlessly. Whether you’re gaming on the go, creating content, or enjoying a rich multimedia experience, integrating these cards into a USB-C hub is a simple yet powerful addition for any handheld gaming enthusiast.
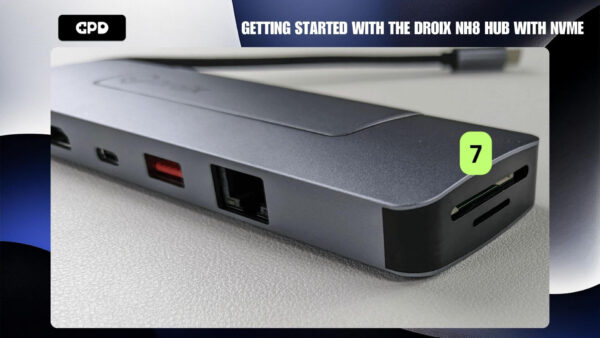
- SD & MicroSD Card Slots
NVMe Installation
The NH8 USB-C Hub offers additional storage expansion through its PCI-e 22*80 NVMe slot.
NVMe support on the NH8 USB Hub is a game-changer for handheld gaming devices, providing a substantial upgrade in both storage capacity and speed. With the PCI-e 22*80 NVMe port, you’ll experience faster game load times, quick data transfers, and ample room for a vast game library—all while preserving your device’s internal memory. Say goodbye to long waits and limited storage.
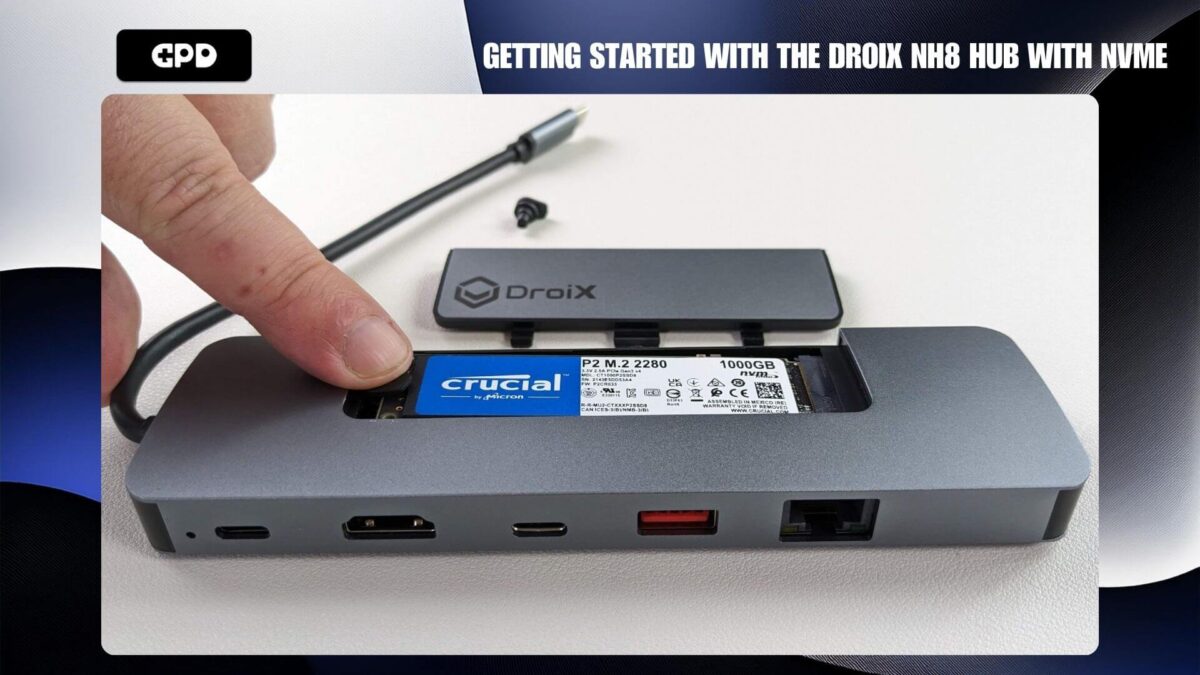
To install an NVMe into the NH8 Hub:
- Ensure the DROIX logo is facing upwards.
- Open the NVMe enclosure (refer to Image 2 below).
- Remove the rubber screws.
- Carefully insert the NVMe (refer to Image 4 below). Tip: Insert the NVMe at an upward angle.
- Secure the NVMe into the NH8 using the rubber screw (refer to Images 5 & 6 below). Tip: Before pushing the NVMe down, place a rubber screw on it (refer to Image 4 below).
- Close the NVMe enclosure.

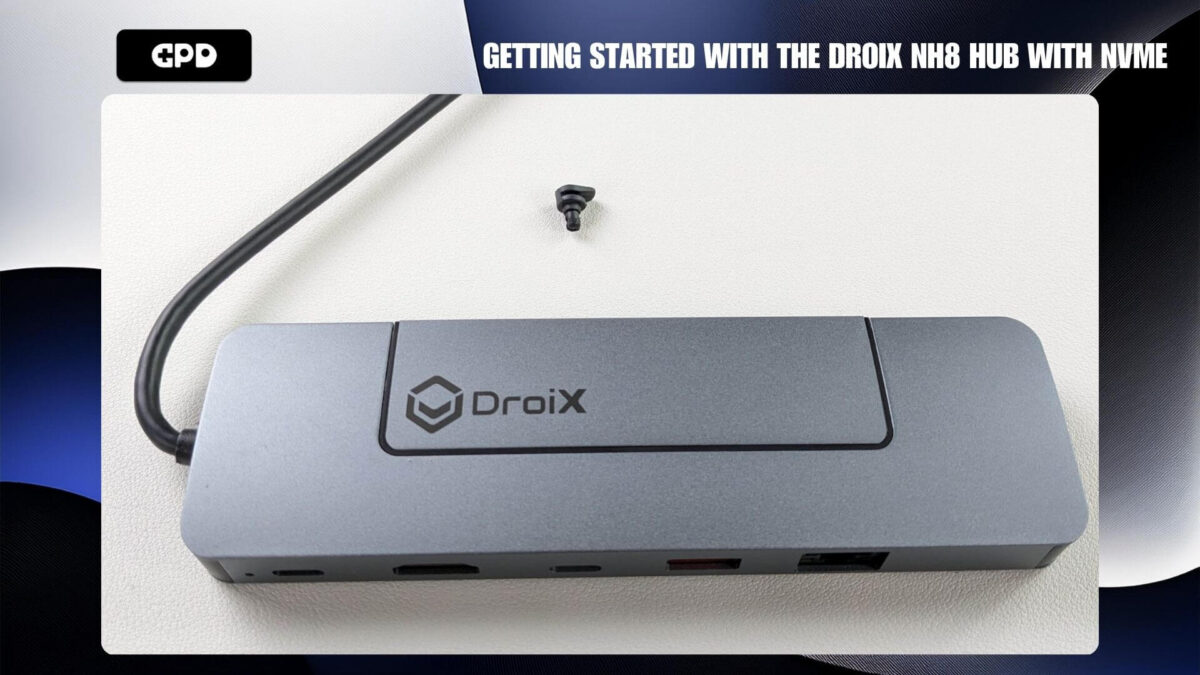
- NH8 Hub
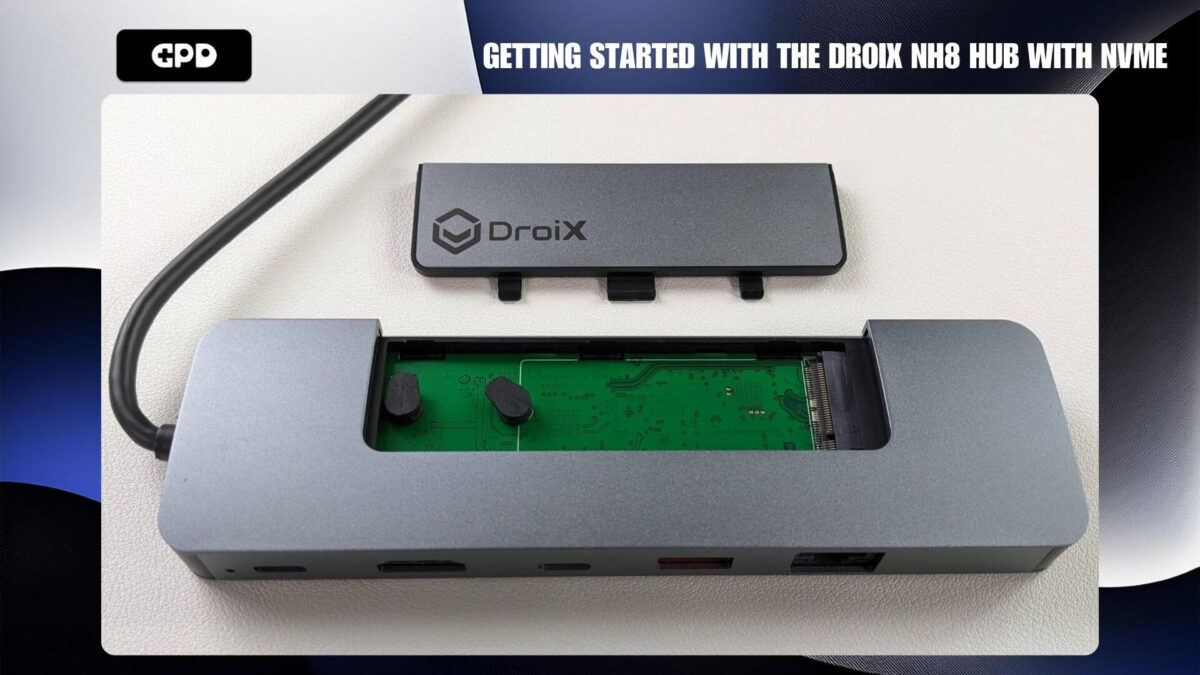
- Open NVMe enclosure
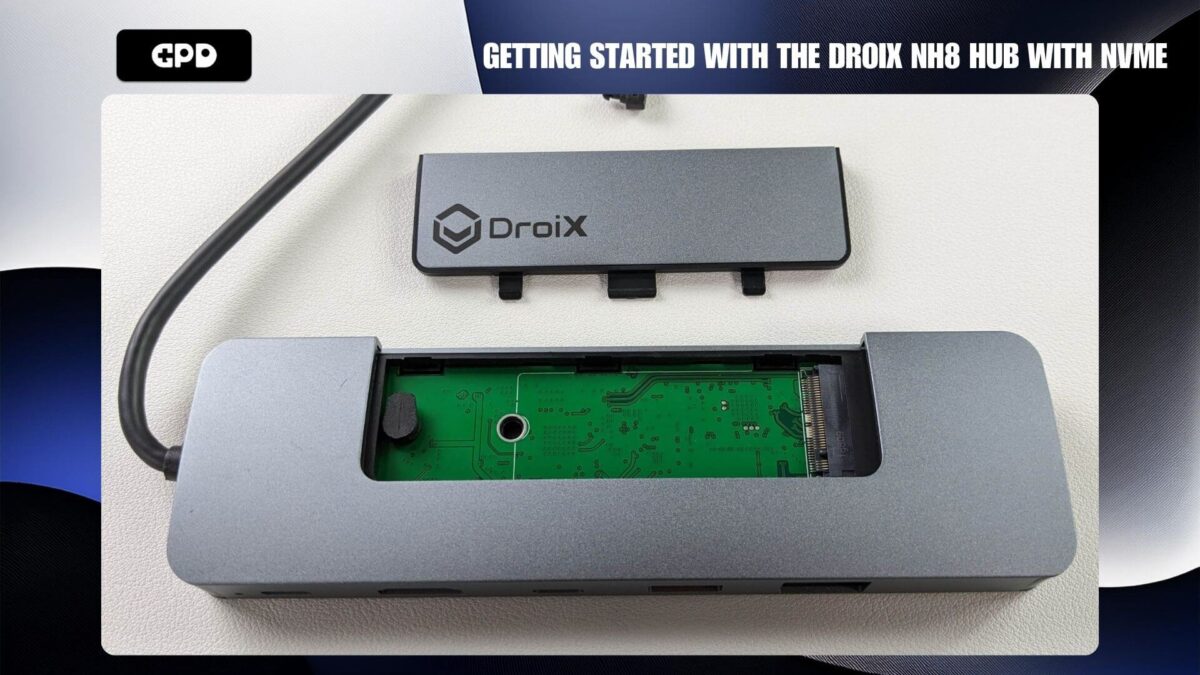
- Remove rubber screw
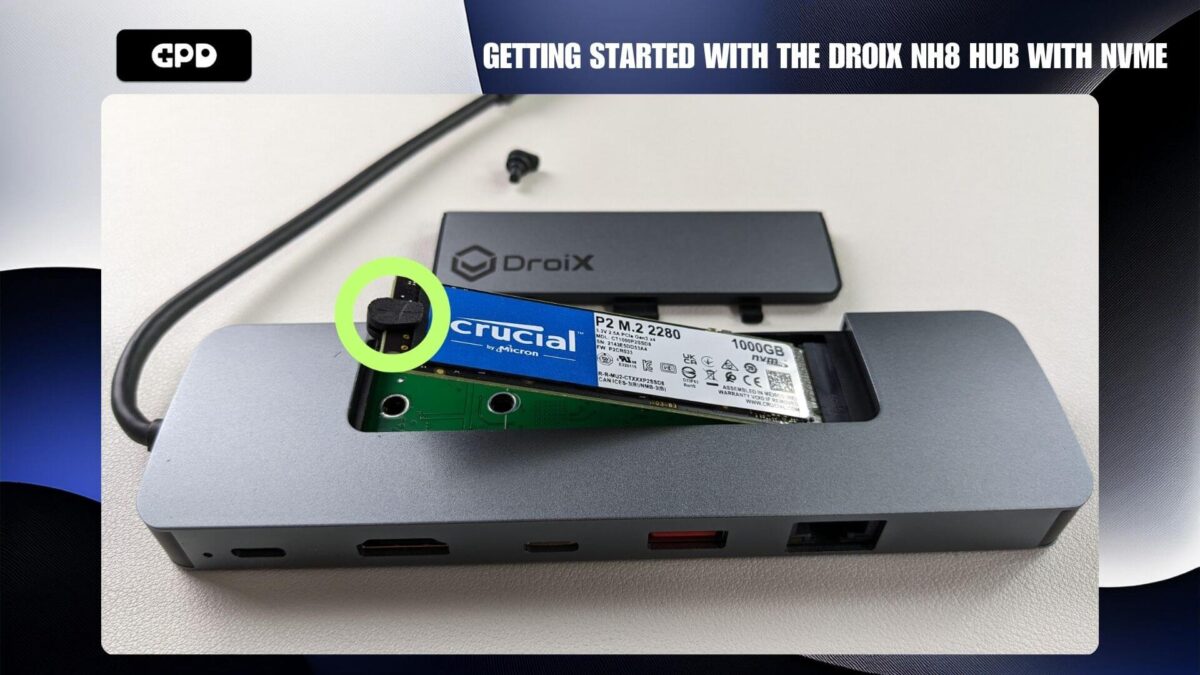
- Insert NVMe
- Screw NVMe into NH8
- Close NVMe enclosure
Device Settings
Windows Display Settings
The NH8 Hub revolutionizes visual quality and fluidity, supporting up to 4K resolution and a smooth 60Hz refresh rate through its HDMI port. This ensures your games look stunning and play seamlessly. If both your device and display support higher resolutions, we recommend setting them to the maximum resolution and refresh rate available for an enhanced gaming experience. This will bring out the best in your games’ graphics and ensure smoother gameplay.
Keep in mind that increasing the resolution and refresh rate can lead to higher battery consumption, which is important when using your device in handheld mode. To optimize performance and battery life, consider adjusting these settings based on your current usage needs.
To adjust your settings in Windows 11:
- Type “Display Settings” in the Windows search bar and open it.
- Change the Display Resolution to the highest available option.
- Select Keep Changes.
- Go to Advanced Display Settings.
- Change the Refresh Rate to the highest available option.
- Select Keep Changes.
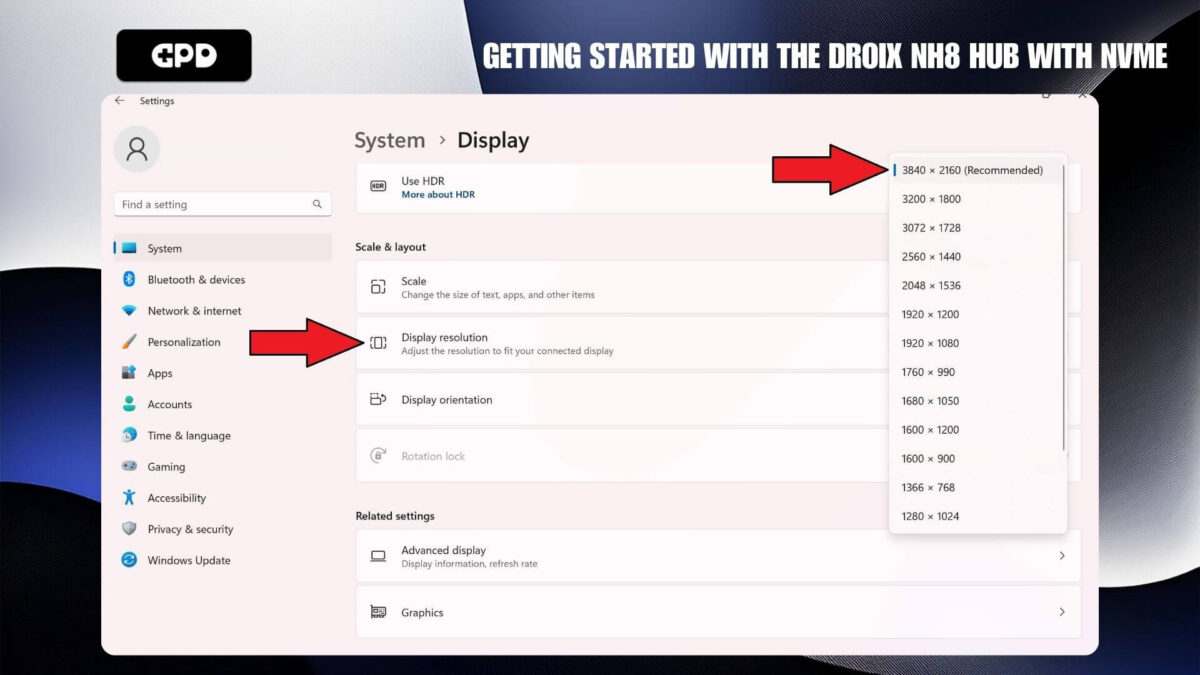
Select the highest Display Resolution
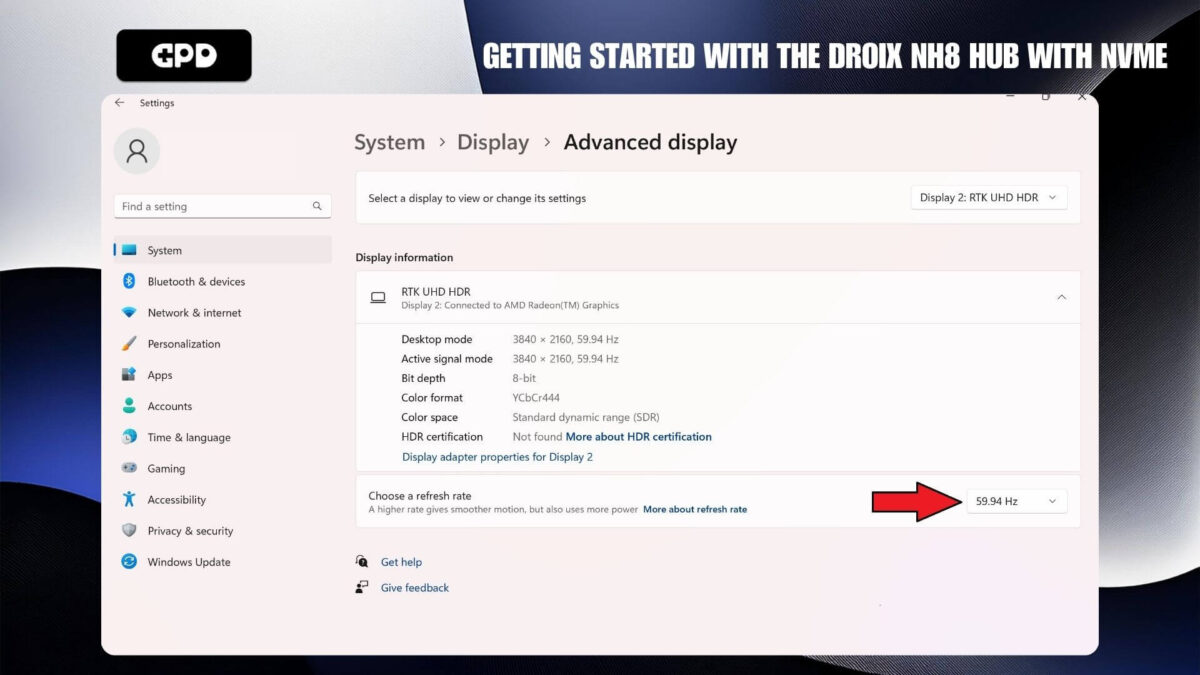
Select the highest Refresh Rate
Please note, your handheld device may appear slightly different depending on its specific settings and configuration.
DROIX NH8 USB Hub with NVMe
- DROIX NH8 USB Hub with NVMe
- 10/100/1000M Gigabit Ethernet
- Built-in PCIe NVMe Slot for Storage Expansion
- 4K Display Output Via HDMI
- MicroSD / SD Card Slot – Up to 5Gbps
PAYMENT INFO
We use the latest technology in Payment Processing, which allows you to checkout via your Debit/Credit Card, or PayPal for a fast and secure experience.
WARRANTY
2 Years Warranty from DROIX Global for your peace of mind
QUALITY ASSURANCE & PRE-DISPATCH TESTING
Ensuring Customer Satisfaction at the Highest Standard: Every device undergoes rigorous testing and a multi-point quality assurance check before it is shipped. Our dedicated team verifies performance, functionality, and component integrity to guarantee your GPD device is in perfect working order upon arrival, providing you with confidence and peace of mind.
PRICING, TAXES AND SHIPPING
Note:
- United States Customers: The displayed price does NOT include TAX nor duties. Liability to clear customs and pay any associated tax/duties lies on the customer.
- EU Customers: The displayed price includes applicable TAX, which may be up to 25% depending on your country.
- Canada Customers: The displayed price includes applicable taxes, which may include 5% GST and additional Provincial Sales Taxes (PST), Harmonized Sales Tax (HST), or Quebec Sales Tax (QST), depending on your province.
For Our USA Customers: Orders are dispatched DAP (Delivered At Place). While customers are responsible for payment of any applicable tariffs, we draw on our extensive experience shipping from the UK to ensure you pay the least possible charge. Based on our records, these charges typically do not exceed 10% of the item value.
For EU Customers ONLY: Express DDP (Delivered Duty Paid). This means:
- All customs duties and taxes are included in the price displayed on the product page.
- You will not need to pay any additional charges upon delivery.
- In the rare event of customs-related issues, our team will handle the customs clearance process on your behalf to ensure a smooth delivery experience.
Important Information About Returns:
- If you decide to return your order or request a refund, please be aware that taxes and duties paid on your behalf under DDP terms cannot be refunded.
Please refer to our Terms & Conditions for detailed information.
CUSTOMER SUPPORT
Got a question? We’re a short text away from having your issue sorted!
Please refer to our Terms & Conditions for detailed information.
WHAT’S INCLUDED
- 1x DROIX NH8 USB Hub with NVMe
29.95Price range: 29.95